
Building a Free Web Server
Ever wanted to build your own blog or websites, but didn’t like the idea of forking out monthly fee’s to keep it running? Well, there is no such thing as truly free, but in this article series we will cover how to build a low cost web server which you can run from your home, and how to tackle a lot of the issues commonly associated with home run servers.
I say no web server is truly free because while we can tackle all the software installs and services required at no cost, there isn’t any easy way to circumvent the need for hardware, as well as the monthly electricity costs of running the server.
In the first article in the web server & development series we will cover:
- Hardware Options
- Choosing and installing an OS
- Installing LAMP on our selected OS
- Installing a control panel
Hardware Options
Choosing what hardware to use for your web server is one of the trickiest decisions to make. You’ll first want to identify your needs and get a rough idea of what kind of traffic and content you’ll be serving. For the purpose of this article, we are going to focus on ultra cheap solutions, since the original goal is to build a server for “free”. These solutions will be perfect for a low traffic blog, or for medium traffic sites serving static content.
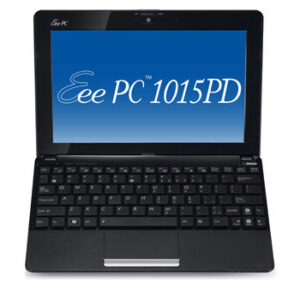
The first question to ask is whether you have any hardware already available to use? When I set out to build my free web server, I happened to have a eeepc netbook collecting dust on a shelf. This was an attractive option because netbooks are by nature, low power consumption, and that means my monthly electricity costs will be quite low. When considering using existing hardware, remember that the old PC in your closet that was a beast in it’s time is probably a huge resource hog and going to give you a very poor performance to power consumption ratio.
No hardware to use? Well we may need to look at buying some hardware then. I’m a big fan of the netbook solution because they are cheap, use very low power, often come with SSD’s and the battery backup acts as a UPS if you were to have some short power outs in your area. SSD is a big selling point here, as it will be a big factor in our response times and MySQL performance. If you’re buying new you should seek this out unless you really need size > speed for the HDD.
If you want something with a bit more beef you could look at building a low cost mini or micro atx PC. The newer Celeron processors give quite a bit of a bang for the $ and are quite low energy consumption. Consider checking the use markets to keep your costs down on things like a case, memory, motherboards, etc that don’t need to be as bleeding edge. Put your money into the processor and an SSD to get the best performance out of your server.
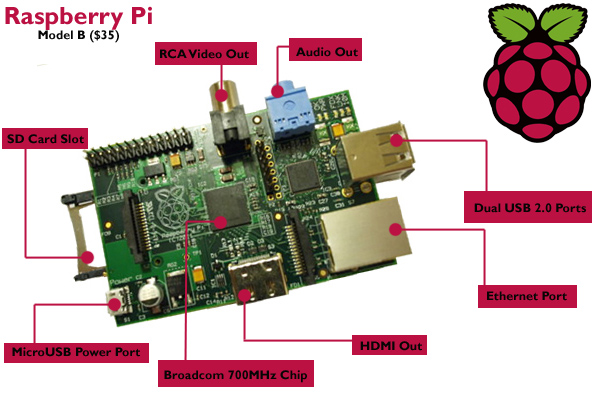 Some other, even cheaper but slower options would be to look at the new influx of tiny small form factor computers such as Raspberry Pi or a solution from Plug Computer. Note that these will require some technical skills to implement into a web server and may in some cases require the addition of a storage unit to operate.
Choosing an OS
Now that we have our hardware set, we are going to install our OS. Luckily when it comes to a server OS, the free and open source solution is also the industry standard. Obviously, yes, that means we are going to be installing a Linux distro of some sort.
![]()
The distro you want to use is really up to you, but keep in mind that the more popular distro’s are going to be much easier to get support and software for down the line. My recommendation? If you are completely new to Linux I would suggest using Ubuntu. It has one of the best and biggest community’s and with that, is one of the easiest to get support on. It is also built with security in mind, and built in a way to protect new users from themselves, and make upgrading and patching your server as simple as possible.

CentOS is another extremely popular free linux distro (based on Red Hat) used for web server management. On most professional web hosts / VPS / Dedicated servers you will find CentOS because of it’s support of WHM/CPanel software.
Installing LAMP
What is LAMP? LAMP stands for Linux – Apache – MySQL – PHP (or Perl/Python). A LAMP server is a web server running a collection of open source software to serve dynamic content to the user. While not the only platform for serving dynamic web content, it is definitely the industry leader and as close to a standard as it’s going to get.
Once a LAMP stack is installed on our server it’s going to allow us to run all sorts of pre-built website software, such as our CMS, Blog or Forum. Most software such as WordPress, Joomla, PhpBB are designed to run on a lamp stack and we are going to have a huge choice of software to use for our sites.
If you need help installing the LAMP stack I recommend searching for and reading some tutorials. There is a plethora of information on this out there and it’s quite easy to do.
LAMP can be installed from TaskSel quite easily.
sudo apt-get update
sudo apt-get install tasksel
sudo tasksel
If you need more assistance with LAMP installations, here are some tutorials I found useful:
Installing a Control Panel
If you’ve ever used a professional web host, I am sure you are familiar with the software “cPanel” . Well unfortunately that is where our “industry standard” web server is going to end. cPanel has licensing fee’s and is not open source.
For those unfamiliar with cPanel, it is basically a GUI for your web server, greatly simplifying the execution of server configuration tasks. As an example, you can add website domains to your account, create mysql databases and users, create ftp accounts and much more.
This is an area where there are a handful of open source alternatives, but no product has quite stepped up to take the reigns as the go to / standard open source control panel solution. In this article we will look at 2 pieces of open source software which combine to form a very powerful alternative to cpanel. Those are Webmin and ZPanel.
ZPanel

Zpanel is a free and open source alternative which closely resembles the functionality of cPanel.
*UPDATE MAR 25 2014*
I’ve decided to remove ZPanel as a recommendation due to continued, high severity security issues. The programmers behind this otherwise amazing cPanel alternative just can’t seem to get it all together despite the community giving them more and more chances to do so. There has also been some hostility from developers to the community in the past to some people who were helping to report bugs and that has left a bit of a sour taste in everyone’s mouth.
VirtualMin / WebMin
![]()
Instead, I strongly recommend installing VirtualMin which is what I personally use to manage my web servers on my unmanaged VPS. VirtualMin / WebMin is extremely easy to install on a variety of Linux distro’s and quite easy to use. It is essentially just as powerful as WHM/cPanel even if it lacks a bit of the visual prowess. Transferring a website from cPanel backups to VirtualMin was also quite pain-free which is a plus.
To install Virtualmin:
- Go to the site: http://www.virtualmin.com/
- Go the Download page http://www.virtualmin.com/download.html
- At the bottom you will “Virtualmin GPL Downloads” which is the GNU license free version of the software. The software comes with an installation script for most Linux distro’s so all you will need to do is a basic wget of the files to your server, chmod the script to execute and then run the script. Instructions are detailed on the site if you need the specifics for these commands.
What’s Next?
Your web server is ready to use!
Check out the next articles in the web master series in which I will start to discuss solutions for some of the common pitfalls of running a home server.
- Using a free Dynamic DNS service to host a website without a static IP
- What to do if your local http ports are blocked by your ISP
- Free mail hosting if your SMTP ports are blocked by your ISP
- How to improve performance of your website with a free CDN
- Get a Free Domain with a Top-Level Domain Provider
